PROXY SETUPS
Very often I will create two versions of an element. A full render quality object, and a Viewport proxy with just enough detail to animate with. This can be as simple as a reduced environment with boxes and spheres replacing furniture and plants or as complex as a fully rigged machine with low poly parts for responsive animation. If you look at example from Banque Populaire 'Mutual' above, the proxy object was more than adequate to show the position of the bike when blocking the animation and working on other elements. View a making of for that advert here.
The most basic of setups would be to create a simple User Data boole switch to choose which version is visible in the Viewport. If you want to retain control within hierarchies and still be able to hide the whole group by turning its Parents' visibility off then just connect a Math:Add to turn your Boole's default 0/1 values to 1/2. This means the 'Visible in Editor' parameter will switch between the values 'Default' (Grey:2) instead of On (Green:0) and 'Off' (Red:1). The comparison below should explain more clearly:
I've mentioned already that turning off an objects' visibility is only half the battle when it comes to Viewport speed. This is where things can get tricky, when you take into account that the ‘Render Quality’ (High Quality) state could include many Generators, Deformers and Expressions that are constantly calculated, the simple visibility switch is fairly ineffective. If you are only switching between high-res polygon objects and low-res proxies then this is absolutely sufficient.
If your 'High Quality' group is comprised of more complex objects, then one option to link everything to your User Data switch via xpresso and disable the calculations by linking User Data to the 'Enable' port of all Generators and Deformers. This can get messy and hard to maintain. Object lists help but also require quite a lot of work to set up, requiring you find every Generator and Deformer that you want to disable and add it to the list:
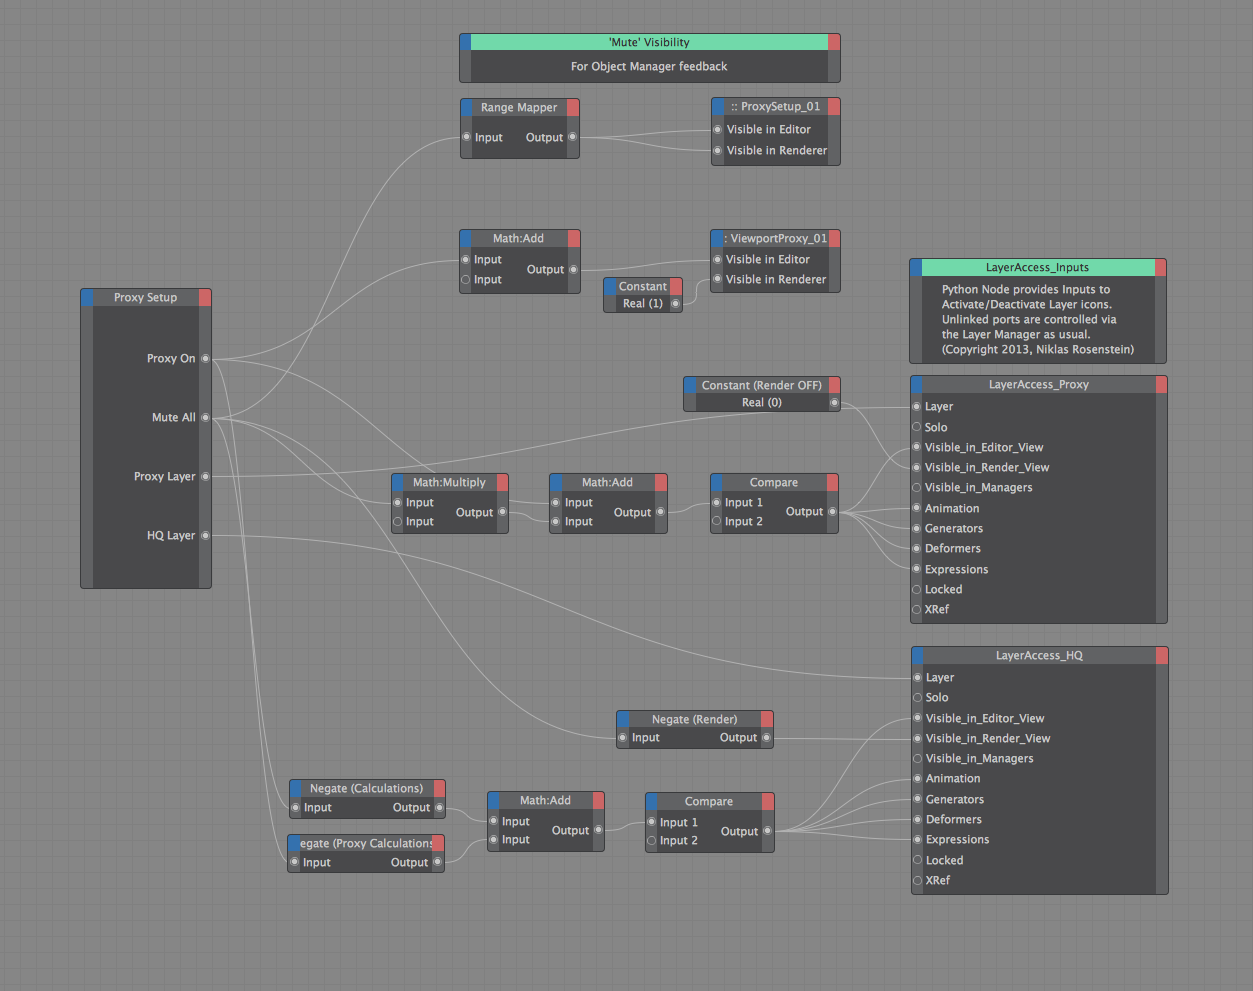
Recently Niklas Rosenstein created a new Xpresso node called 'Layer Access' (CLICK TO DOWNLOAD). This provides a lot more control over the Layer Manager via Xpresso than C4D natively allows. My current favourite method for proxy setups is to utilise this node and assign my 'Proxy' and 'HQ' groups to seperate layers and link all visibility and calculations to one User Data control. See the images below for an idea of how to start. The great thing about this is the speed of setup and simplicity coupled with amount of control. If there is a particular object that you want to keep visible/calculated then simply remove that object from the 'HQ' layer. Otherwise, cmd+dragging the entire HQ group to a layer, then dragging that layer to User Data field will kill every single calculation for that whole group with one click. In my opinion that is pretty exciting!


